Posted on
October 29, 2026
Inflatable Seal Failure Modes on Rolling Stock and How to Prevent Them
The main ways rail inflatable seals fail in service, how to recognise each failure mode, and how design, specification and installation can prevent them.
Inflatable seals rarely fail without warning. Almost every failure has a recognisable signature in how the seal looks, where it leaks and when the problem started. Reading that signature correctly is the difference between replacing a seal that will fail again and fixing the real cause.
This guide sets out the main failure modes seen on rolling stock, how to recognise them and what design, specification and installation can do to prevent them. If you are looking at a seal that is losing pressure right now, our diagnostic sequence for a door seal losing pressure is a practical companion to this article.
Why Failure Modes Are Worth Studying
A seal that fails after six months and one that fails after six years are often the same product under different conditions. The cause is usually one of a short list: material degradation, mechanical fatigue, installation damage, contamination or a problem in the air circuit. Each leaves different evidence.
Studying the evidence has a practical payoff. It tells you whether a like-for-like replacement is a sensible repair or a repeat of the same failure, and it tells the design team which specification item needs attention. For a broader discussion of how early failures arise, see our article on why inflatable seals fail early.
The Main Failure Modes
The table below lists the failure modes seen most often, what each looks like, its typical cause and how it is normally prevented. The sketch that follows shows where on the seal each tends to appear.
| Failure Mode | What You See | Typical Cause | Prevention |
|---|---|---|---|
| Ozone or weathering cracks | Fine surface cracks, often on the outer face or at bend points | Inadequate ozone resistance, long periods under strain | Specify ozone test results, use a suitable compound |
| Flex fatigue at the wall | Cracks or leaks at the folds of the tube | Over-pressure, too large a stroke, cycle count above design | Size for real gap, set correct pressure, confirm cycle test data |
| Fabric delamination | Bulging, blistering or local ballooning | Poor bond between rubber and reinforcement, over-pressure, heat | Control bonding quality and pressure, check heat exposure |
| Splice or joint failure | Leak at a joint, often at a corner or at the length joint | Weak joint, corner stress, poor splice quality | Specify splice testing, avoid sharp corner radii |
| End connector leak | Air loss at the supply connection | Poor termination, loose clamp, cracked fitting | Specify a validated termination and torque |
| Retention failure | Seal walks out of the groove or lifts | Groove fit, retention method, door contact | Match groove to profile, test pull-out |
| Heat set and compression set | Seal does not retract or does not fully expand | Long exposure at temperature, wrong compound | Specify compression set at the right temperature |
| Abrasion and cuts | Scored or cut outer surface | Door frame edges, debris, installation damage | Radius edges, add a wear face, install carefully |
| Contamination | Seal sticks, dirt or ice in the contact line | Dirt, grease, ice, cleaning agents | Surface coating, drainage, correct cleaning agents |
| Chemical attack | Swelling, softening or tackiness | Cleaning agents or fluids not compatible with the compound | Check fluid compatibility before specifying |

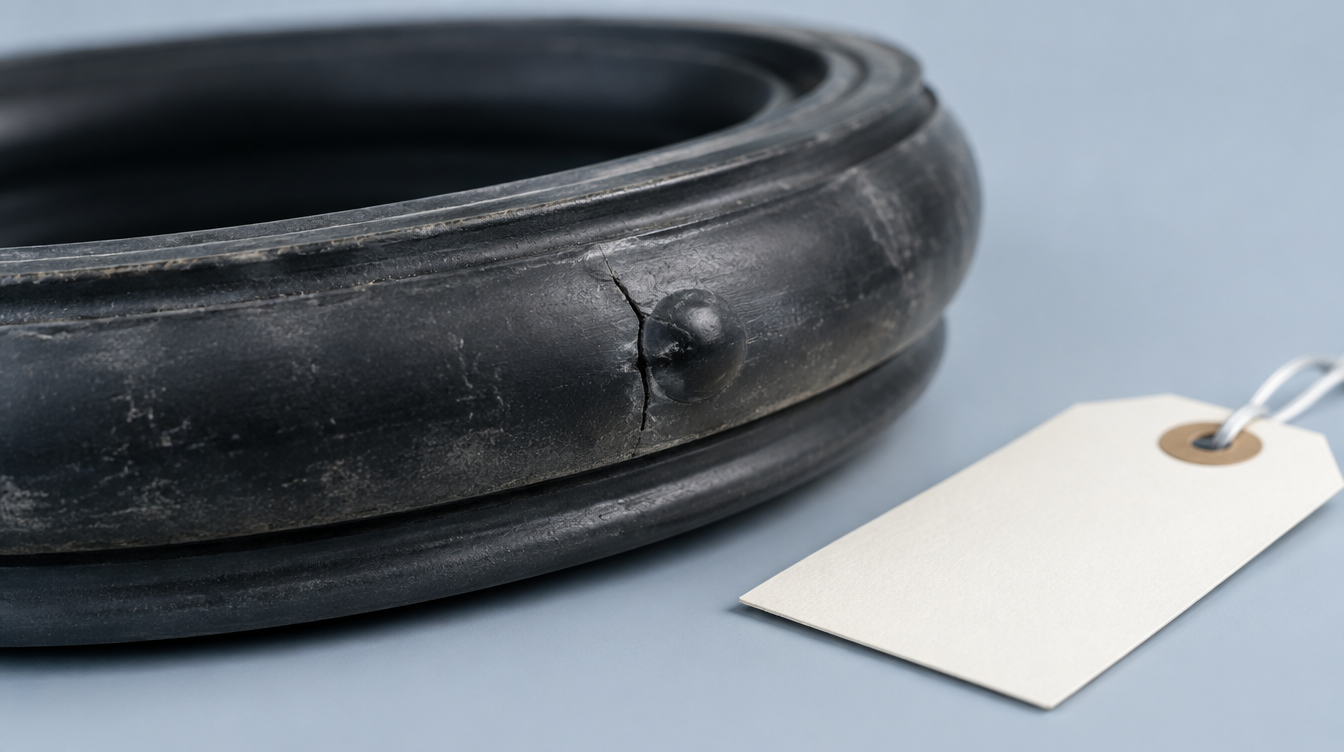
The pattern of locations is informative. Failures on the outer face usually point to the environment, failures at the folds point to mechanical stress, and failures at joints and terminations point to manufacture or installation. A failure that appears in the same place on several seals is worth treating as a design signal rather than a coincidence.
Material Degradation: Ozone, Heat and Chemicals
Rubber ages. Ozone attacks stretched rubber and produces cracks that grow at right angles to the strain. Heat hardens or softens a compound over time and can leave a seal that does not retract fully. Cleaning agents and fluids can swell or soften a compound that is not compatible with them. All three are properties of the compound, and all three can be checked before a seal is fitted. Our guide to ozone, ageing and UV testing for rolling stock rubber explains which tests matter and how to specify them, and our article on Shore hardness and compression set covers the set behaviour that leads to a seal that no longer expands.
The choice of base polymer sets the starting point. Our elastomer selection guide for rail and the comparison of silicone and EPDM inflatable seals describe how the main options differ in ageing and fatigue behaviour.
📌 Note: Ozone cracks grow at right angles to the strain, so a seal that stays compressed or stretched for long periods is among the most exposed.
Mechanical Causes: Fatigue, Delamination and Joints
An inflatable seal wall bends at every cycle, so fatigue is built into its life. The question is whether the design keeps the strain inside what the wall can survive. Over-pressure, an oversize stroke or a cycle count above what the construction was designed for shortens that life. Delamination, where the rubber separates from the fabric, shows as bulging or blisters and is linked to bond quality, over-pressure and heat. The pressure side of this is covered in our article on pressure mistakes that cause inflatable seal bursts, and the role of reinforcement is explained in our comparison of fabric-reinforced and non-reinforced inflatable seals.
Joints and corners are the other mechanical weak point. A corner that is formed too tightly concentrates stress, and a poorly made joint becomes a leak path. Where a frame needs corners, the method of joining should be specified, as described on our spliced and vulcanised seals page. The effect of profile choice on these stresses is covered in our guide to inflatable seal profiles for rail doors.
Installation, Retention and Contamination
A sound seal can still fail if it is fitted badly. Twisting, over-stretching, trapping the seal in a corner or failing to seat the foot fully can all cause damage that appears weeks or months later. Retention failure, where the seal walks out of the groove, can also follow from a groove that does not match the profile. Clear installation instructions, and training for the people who fit the seals, remove many of these failures at low cost.
Contamination works differently. Dirt, grease, ice and some cleaning agents change how the seal behaves at the contact line, causing sticking or poor sealing. A surface coating, good drainage and cleaning agents that suit the compound all help, and the depot's real cleaning products should be checked against the compound before they are accepted for use.
When the cause lies in the air circuit rather than the rubber, no change to the seal will cure it. Our guide to the pneumatic control systems behind rail inflatable seals explains the circuit side.
Failure Modes That Look Alike
Several failures produce the same symptom, which is a door that will not seal or an air consumption problem. A pinhole in the tube, a cracked connector and a failed splice all show as lost pressure. The location and the way the seal looks when removed help separate them. A bubble test or a controlled leak-down test on the removed seal is faster than guessing.

The diagram is a starting point, not a verdict. Cracks at the folds and cracks on the outer face can have different causes, and a blister can appear in a seal that has also suffered abrasion. Use it to decide what to measure next.
💡 Tip: Note where on the seal the leak appears and when it began before you remove it. Location and timing are the fastest clues to the cause.
What Prevention Looks Like in Practice
Most prevention happens at the design and specification stage. The checklist below summarises the practices that matter most, and the list gives the detail.
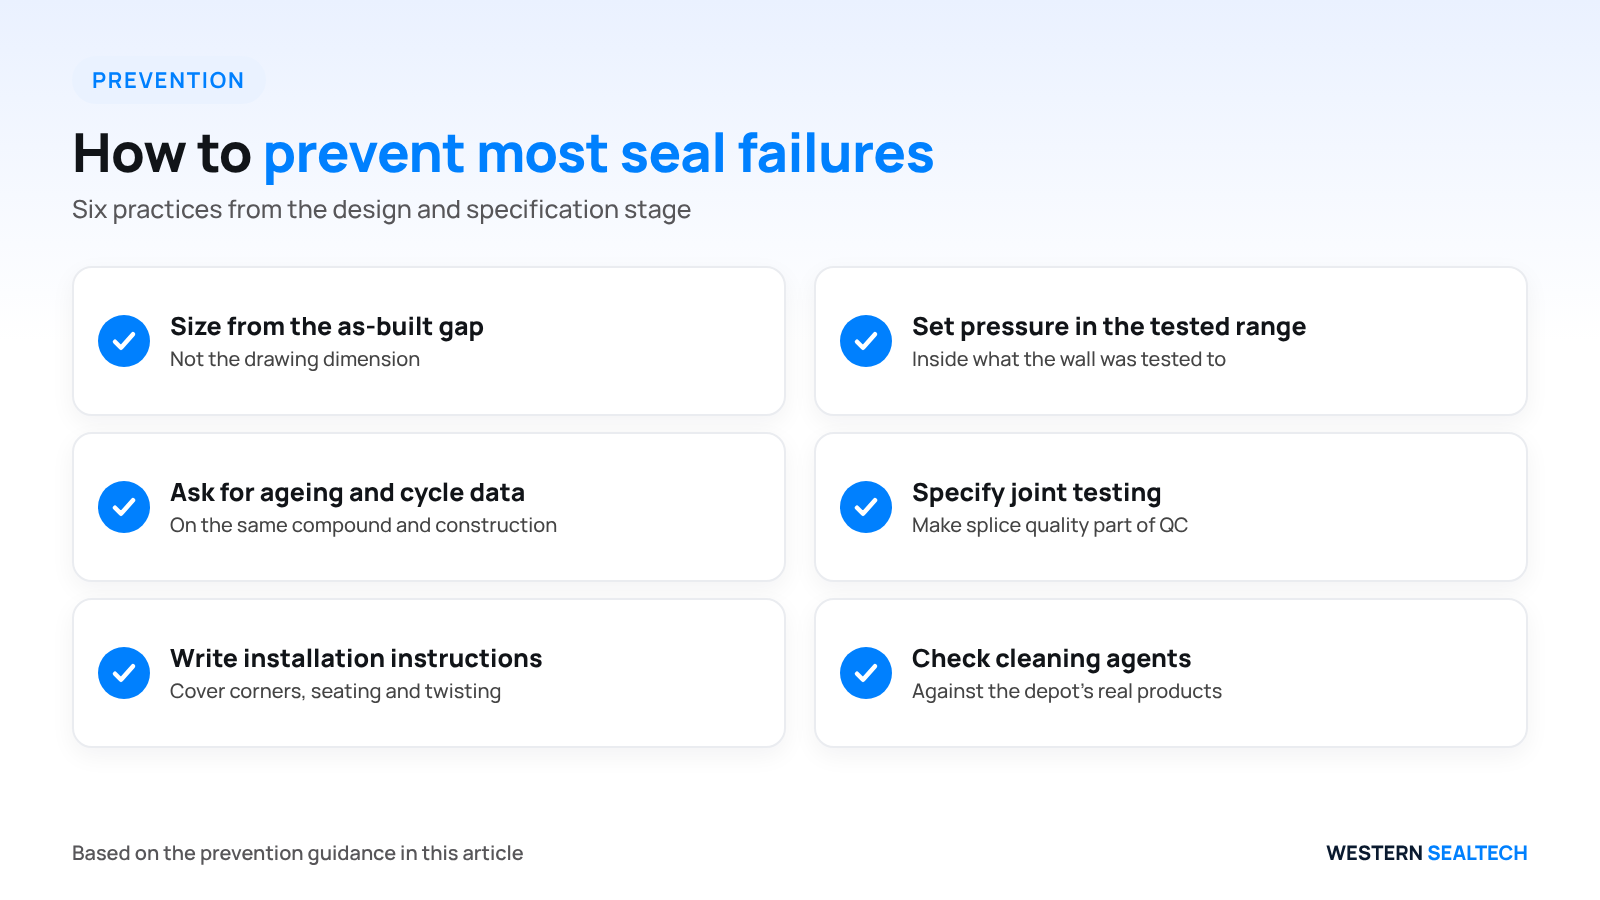
- Size the seal from the measured, as-built gap rather than the drawing dimension
- Set working pressure inside the range the tube construction was tested to
- Ask for ozone, heat ageing and cycle test data on the same compound and construction
- Specify splice or joint testing as part of quality control
- Include installation instructions that cover corner handling, retention seating and avoidance of twisting or over-stretch
- Check cleaning agent compatibility with the depot's actual products
Sizing is worth a second look, because it underlies several of the failure modes above. Our guide to sizing an inflatable seal for gap, tolerance, stroke and pressure shows how the real gap range drives stroke and pressure, and our article on inflatable and static door seals helps confirm that an inflatable system is the right choice for the door in the first place.
✅ Quick win: Size from the measured as-built gap. It costs only time on real, assembled doors and removes a frequent cause of early failure.
Failure Analysis on a Returned Seal
When a seal is returned for analysis, the most useful information is the vehicle type, the mileage or cycle count, the time in service, the location of the failure on the door, the air circuit condition and any cleaning or washing practices. A sectioned sample, a pressure decay test and a measurement of physical properties against the original specification usually identify the cause.
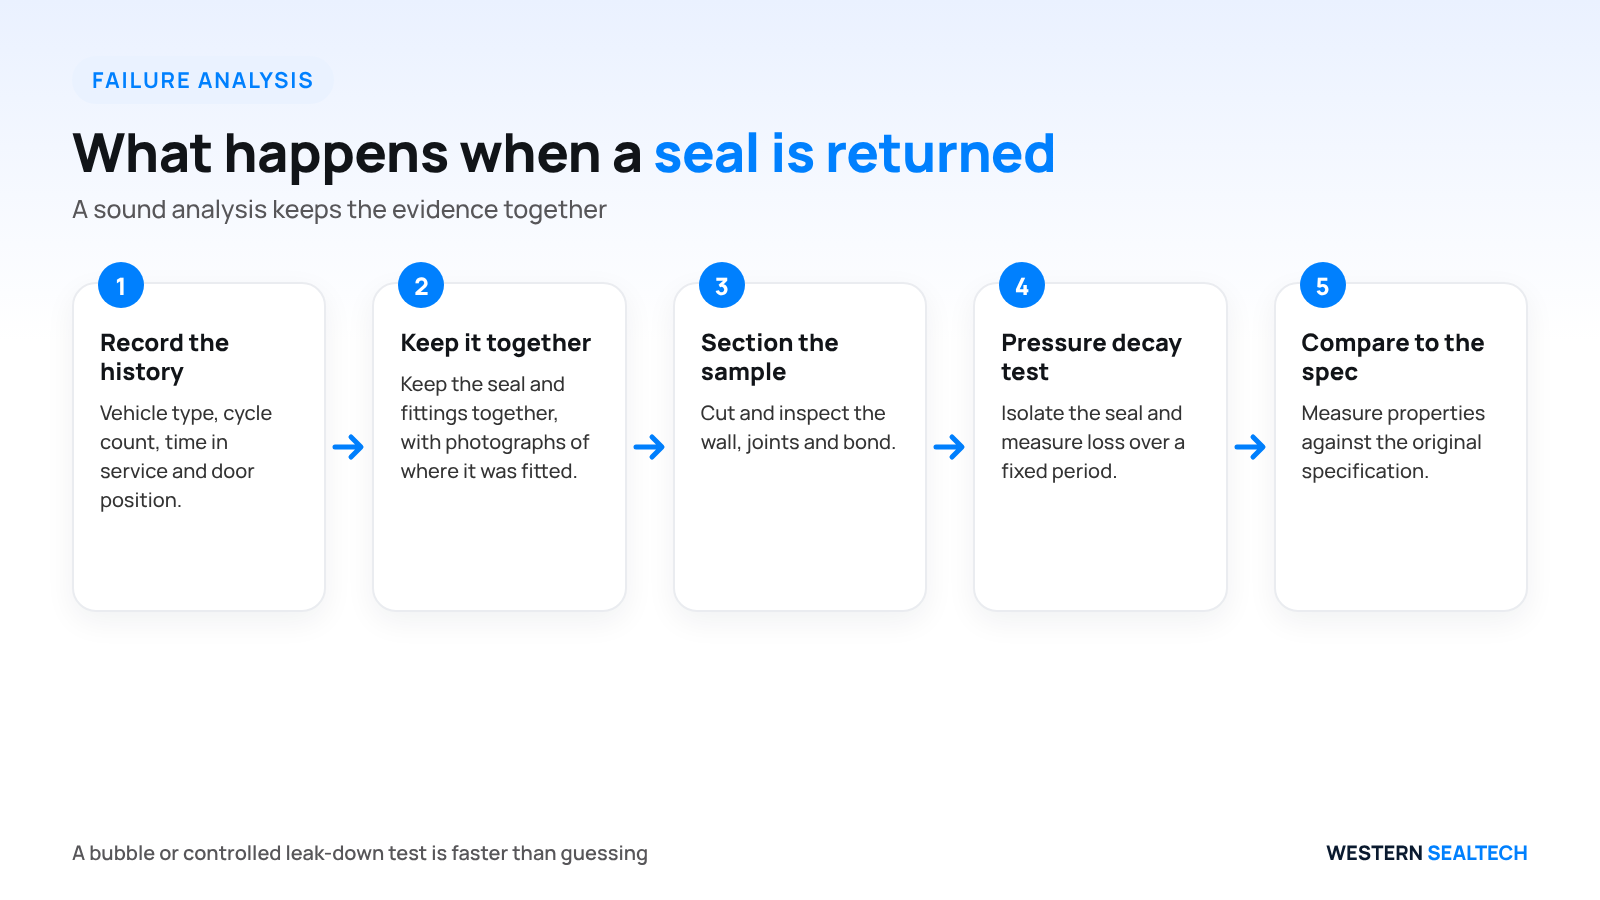
The order of these steps protects the evidence. Photographs and records come first, because once a seal has been cleaned, cut or pressurised the original condition cannot be recovered. Materials work on the finished construction, including the fire and ageing properties described in our article on inflatable seal materials for rail, is best carried out after the physical examination.
📌 Note: Keep the failed seal and its fittings together, with photographs of where it was fitted, so the evidence is not lost before analysis.
For rail projects, our rail and mass transit sealing page describes the range we supply, and our inflatable seals page covers the product itself.
Key Takeaways
Inflatable seal failures almost always leave a recognisable signature: ozone cracks, flex fatigue, delamination, splice or connector leaks, retention failures, set, abrasion, contamination or chemical attack. Sizing from the real as-built gap, setting pressure inside the tested range, controlling joint quality and checking cleaning agents prevent most of them. When a seal does fail, isolate it from the air circuit before deciding on a repair or replacement.
Seeing repeat inflatable seal failures on your fleet? Send us the failure details and a returned sample and we will help identify the cause.
Need a custom sealing solution?
Talk to our engineers about inflatable seals, rubber diaphragms and custom extrusions built to your exact spec. We respond within one business day.
Frequently asked questions
What is the most common reason an inflatable seal fails early?
It varies by platform, but sizing errors that leave the seal over-stressed, installation damage and air circuit problems are frequent. Material ageing usually appears later in service life.
Can a seal be repaired after a splice failure?
Sometimes, depending on construction and location, but a repair at a corner or a high-stress area often fails again. Repair or replace decisions should consider the cause of the original failure.
How can I tell a seal failure from an air circuit failure?
Isolate the seal from the circuit and test each separately. If the seal holds pressure when isolated, the problem is upstream of the tube.
Does a higher inflation pressure improve sealing?
Only up to the design pressure of the tube. Above that, it speeds up fatigue and delamination.
Do cleaning agents shorten seal life?
They can, if the compound is not compatible with them. Always check the depot cleaning products against the seal compound before specifying.
Why do cracks sometimes appear at the folds of the tube?
The wall bends at the folds on every inflation, so cracks there usually point to flex fatigue from over-pressure, an oversize stroke or a cycle count above what the construction was designed for.
What should I send with a failed seal for analysis?
The seal and its fittings together, photographs of where it was fitted, the vehicle type, the cycle count or time in service, the position on the door and any washing or cleaning practices.

Need a quote?
For custom rubber sealing solutions contact us. We will respond to you within 1 business day